


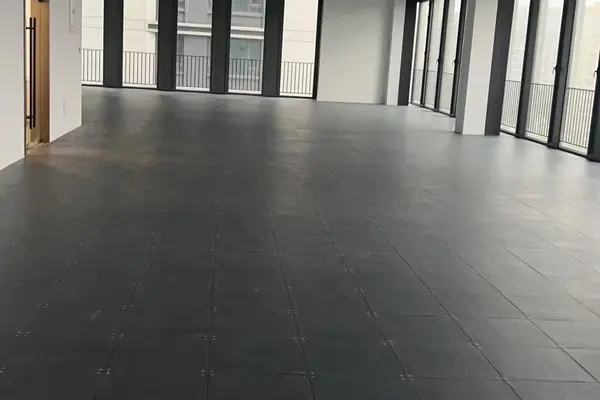
Installing a raised access floor requires careful planning, accurate positioning, stable pedestal installation, and proper floor panel leveling. The quality of the installation can directly affect the stability, appearance, safety, and long-term performance of the complete flooring system.
A typical raised access floor system consists of removable floor panels, adjustable pedestals, and, depending on the system design, horizontal stringers. During installation, these components are assembled above the structural floor to create an accessible underfloor space for cables, electrical systems, communication lines, and other building services.
Although installation methods may vary according to the floor system, panel material, finished floor height, and project specifications, the basic process generally includes subfloor inspection, layout planning, pedestal positioning, height adjustment, panel installation, cutting, leveling, and final inspection.
What Should Be Checked Before Installing a Raised Access Floor?
Before installation begins, the project site should be inspected carefully.
The structural subfloor should be sufficiently clean, dry, and suitable for the installation of the raised flooring system. Dust, construction debris, loose materials, oil, and other contaminants should be removed from the installation area.
The installer should also check the dimensions of the room, finished floor height, equipment locations, columns, walls, doorways, cable routes, and other building services.
Important project information should be confirmed before installation, including:
- Finished floor height
- Floor panel dimensions
- Pedestal type and height range
- Stringer requirements
- Equipment locations
- Cable and service routes
- Floor openings
- Ramps and steps
- Project load requirements
Proper preparation can help reduce installation problems and unnecessary modifications during later stages of the project.
Step 1: Inspect and Prepare the Subfloor
The first step is to inspect the structural floor.
The subfloor should provide suitable conditions for the installation of the pedestal system. Significant surface defects, loose materials, water, and construction waste should be addressed before installation begins.
The installation area should then be cleaned thoroughly.
A clean subfloor makes it easier to position the pedestals and helps the installer identify surface irregularities that may affect the raised floor system.
If required by the project specifications, additional treatments may be applied to the subfloor before pedestal installation.
Step 2: Confirm the Finished Floor Height
The required finished floor height should be confirmed according to the project drawings and site conditions.
The raised floor height is generally determined by factors such as cable quantity, underfloor services, ventilation requirements, equipment layout, and building design.
A laser level or other suitable measuring equipment can be used to establish the finished floor elevation.
Reference points should be clearly marked to help maintain consistent floor height throughout the installation area.
Accurate height control at this stage is important because incorrect reference levels can affect the entire flooring system.
Step 3: Plan the Raised Floor Layout
Before installing the pedestals, the floor panel layout should be planned carefully.
The installer should determine the starting point and establish reference lines according to the dimensions of the room and the floor panels.
A typical raised access floor panel size is 600 × 600 mm, although other panel dimensions may also be available.
The layout should consider walls, columns, doorways, equipment foundations, floor openings, and other structural features.
Proper planning can help reduce the number of narrow cut panels around the perimeter of the room and improve the overall appearance and stability of the finished floor.
Step 4: Mark the Pedestal Positions
After establishing the floor layout, the pedestal positions can be marked on the subfloor.
Pedestals should be positioned according to the panel dimensions and system design.
Accurate positioning is important because each floor panel must be supported correctly at its corners.
Incorrect pedestal spacing can cause problems during panel installation and may affect the stability of the completed floor.
The installer should regularly check the dimensions and alignment during this stage.
Step 5: Install the Raised Floor Pedestals
The adjustable pedestals can then be installed at the marked positions.
Depending on the system design and project specifications, pedestal bases may be fixed to the structural floor using suitable adhesives or mechanical fixing methods.
The pedestal heads should be adjusted approximately to the required floor height.
At this stage, the pedestals should not only be positioned correctly but should also remain vertical and stable.
Pedestal height should be checked regularly using suitable leveling equipment.
Step 6: Install the Stringers If Required
Some raised access floor systems use horizontal stringers between the pedestals.
Stringers connect adjacent pedestal heads and can provide additional lateral stability to the flooring system.
If the selected raised floor system requires stringers, they should be installed according to the system design and project requirements.
The installer should check that the stringers are properly positioned and securely connected before installing the floor panels.
Not every raised access floor system requires stringers, so the installation method should follow the specific system design.
Step 7: Adjust and Level the Pedestal System
Before large-scale floor panel installation begins, the pedestal system should be carefully leveled.
The installer can use a laser level or other suitable measuring equipment to check the height of the pedestal heads.
Adjustments should be made gradually to create a consistent and level support system.
This is one of the important stages of raised access floor installation.
If the pedestals are not properly leveled, the finished floor may have uneven surfaces, unstable panels, gaps, or unwanted movement.
Step 8: Install the Raised Access Floor Panels
Once the pedestal system has been positioned and leveled, floor panel installation can begin.
The panels should be placed carefully onto the pedestal heads or stringer system according to the installation design.
Installation generally begins from the established reference point and continues systematically across the room.
During installation, the installer should regularly check:
- Panel alignment
- Surface level
- Joint consistency
- Pedestal position
- Panel stability
Problems should be corrected as installation progresses rather than waiting until the entire floor has been completed.
Step 9: Cut Perimeter and Special Floor Panels
In most projects, full-size floor panels cannot cover the entire installation area.
Panels near walls, columns, doorways, pipes, and other building features may require cutting.
Before cutting a panel, accurate measurements should be taken.
Suitable cutting equipment should be selected according to the panel material.
Cut edges should be handled according to the panel type and project requirements. Openings for cables, ventilation systems, and other services should also be positioned and finished carefully.
Excessively narrow perimeter panels should be avoided when possible through proper layout planning.
Step 10: Check Floor Level and Panel Stability
After the floor panels have been installed, the complete system should be inspected.
The finished floor surface should be checked for level consistency.
Individual panels should be inspected for movement, rocking, uneven joints, and incorrect positioning.
If unstable panels are found, the installer should identify the cause.
Possible reasons may include:
- Incorrect pedestal height
- Misaligned pedestals
- Improper stringer installation
- Subfloor irregularities
- Incorrectly cut panels
- Debris between system components
Necessary adjustments should be completed before final project acceptance.
Step 11: Install Ramps, Steps, and Accessories
Depending on the project design, additional components may be required.
These can include ramps, steps, handrails, ventilation panels, cable openings, floor boxes, and other accessories.
Accessories should be coordinated with the finished floor height and surrounding building structure.
Special attention should be given to transition areas between the raised access floor and adjacent flooring systems.
Step 12: Clean and Inspect the Completed Floor
After installation is complete, the floor surface and surrounding work area should be cleaned.
Construction debris, panel cutting waste, dust, and other materials should be removed.
A final inspection should then be carried out.
The inspection may include checking:
- Floor level
- Panel alignment
- Panel stability
- Joint consistency
- Perimeter finishing
- Cut panels
- Ramps and steps
- Floor openings
- Accessories
Any installation problems should be corrected before the raised access floor is put into normal use.
What Are Common Raised Access Floor Installation Problems?
Several problems can occur if the installation process is not properly controlled.
Uneven Floor Surface
An uneven floor surface may result from incorrect pedestal adjustment, inaccurate reference levels, or insufficient inspection during installation.
Regular leveling checks can help reduce this problem.
Rocking Floor Panels
Panels may move or rock when the supporting pedestals are not correctly adjusted or positioned.
Debris between components can also affect panel stability.
Large or Uneven Panel Gaps
Uneven gaps may be caused by inaccurate layout, incorrect pedestal positioning, improperly cut panels, or installation errors.
Excessively Small Perimeter Panels
Very narrow cut panels around walls can affect appearance and installation quality.
Proper floor layout planning before installation can help reduce this issue.
Incorrect Floor Height
Incorrect height may create problems at doorways, ramps, steps, and connections with other flooring systems.
The finished floor elevation should therefore be confirmed before installation begins.
How Long Does It Take to Install a Raised Access Floor?
The installation time depends on several factors.
These include the project area, floor system type, room layout, installation height, number of cut panels, site conditions, and installer experience.
A large open room with a regular layout may be installed more efficiently than a project containing many columns, equipment foundations, ramps, steps, and special floor openings.
For this reason, installation time should be evaluated according to actual project conditions.
Can Raised Access Floors Be Installed Without Stringers?
Yes, some raised access floor systems can be installed without stringers.
Whether stringers are required depends on the panel type, pedestal system, installation height, structural requirements, and project specifications.
Stringer systems can provide additional lateral stability, but the appropriate system design should be selected according to the actual application.
How Should a Raised Access Floor Be Maintained After Installation?
After installation, the raised floor should be inspected and maintained according to the floor type and operating environment.
Routine maintenance may include checking panel stability, floor surface condition, pedestal adjustment, damaged panels, cut openings, and underfloor infrastructure.
When panels are removed for cable or equipment maintenance, they should be returned to their correct positions.
Heavy equipment movement and floor loading should also comply with the design capacity of the raised access floor system.
Frequently Asked Questions
What is the first step when installing a raised access floor?
The first step is to inspect and prepare the structural subfloor. The installation area should be clean and suitable for pedestal positioning before layout and installation begin.
How do you level a raised access floor?
Adjustable pedestals are set to the required height using a laser level or other suitable leveling equipment. The floor level should be checked regularly throughout the installation process.
Do all raised access floors need stringers?
No. Some systems use stringers to provide additional stability, while others are designed as stringerless systems. The installation method depends on the selected floor system and project requirements.
What is the standard size of a raised access floor panel?
A commonly used panel size is 600 × 600 mm, although other dimensions may be available depending on the floor system and manufacturer.
Why do raised access floor panels move after installation?
Panel movement may result from incorrect pedestal height, pedestal misalignment, improper installation, debris between components, or incorrectly cut panels. The complete support system should be inspected to identify the cause.
Conclusion
Installing a raised access floor involves more than simply placing panels on adjustable pedestals.
Proper subfloor preparation, accurate layout planning, pedestal positioning, height adjustment, panel installation, cutting, leveling, and final inspection all contribute to the performance of the completed flooring system.
Because raised access floor systems are used in data centers, server rooms, offices, control rooms, and other technical environments, installation quality can affect floor stability, infrastructure accessibility, and long-term maintenance.
Following a systematic installation process and selecting a floor system according to actual project requirements can help create a stable, accessible, and practical raised flooring solution.